Showing posts with label Main Course. Show all posts

Thursday, July 14, 2011

Spicy RC Cola Pork Sandwiches with Cilantro-Jalepeno Slaw

P-Dub has done it again. And, before all you haters go off a-hatin' let's just appreciate the fact that the woman didn't make it on money alone... she's talented. Yeah, I said it.

I've been eye-balling her Spicy Dr. Pepper pork for months but haven't had much time to make anything involving more than 30 minutes of my time since Aubrey started the Fire Academy. Luckily, I worked from home today so at lunch, I popped this baby in the oven and by six it was falling off the bone and winning over my heart. And, it only took a whole 2 minutes to put in the pot. Seriously, quarter an onion, throw in the roast, open a couple cans of peppers and pour in some leftover RC cola from the fourth ( I didn't have Dr. Pepper.)


I had it with P-Dub's cilantro slaw sans red cabbage because apparently it's exclusive to Whole Foods in Tulsa and at $1.69 PER POUND, they can keep it.


Here's the link to the recipe. I halved the pork amount but kept the spice amount and it was SPICY. Almost too much even for me. But, it was so worth it. I highly recommend this one.

Tuesday, January 18, 2011

Pizza

I decided to quit buying Naan for my pizza endeavors and just started making my own. I've done P-Dub's Basic Pizza Crust and it's pretty tasty. I'm still working out the kinks on how to make it crispy on the bottom but, generally it's pretty perfect (Someday, I'll quit being lazy and I'll dig out my pizza stone.) Today, we incorporated kale which was weird but I felt really healthy afterward, despite the massive cheese intake. Total combo included kale, tomatoes, red onion, crimini mushrooms, minced garlic, sundried tomato, and basil pesto base. WHY NOT? It was great.

Wednesday, December 15, 2010

Perfect Roast Chicken


Really. That's all there is to it.

Perfect Roast Chicken
 Not adapted at all from the amazing, Ina Garten.


 Ingredients

1 (5 to 6 pound) roasting chicken - I highly recommend organic. It is so choice.
Kosher salt and fresh ground pepper
1 bunch of Thyme plus 20 sprigs
1 lemon, halves
1head of garlic, halved crosswise
2 Tbsp. melted butter ( 1/4 stick)
1 large yellow onion thickly sliced
4 carrots cut into 2-inch chunks on a diagonal
1 bulb of fennel cut into wedges, tops removed
Olive Oil


1.Preheat the oven to 425 degrees F.
2. Remove the chicken giblets. Rinse the chicken inside and out. Remove any excess fat and leftover pin feathers and pat the outside dry.
3.Liberally salt and pepper the inside of the chicken. Stuff the cavity with the bunch of thyme, both halves of lemon, and all the garlic.
4. Brush the outside of the chicken with the butter and sprinkle again with salt and pepper. Tie the legs together with kitchen string and tuck the wing tips under the body of the chicken.
5. Place the onions, carrots, and fennel in a roasting pan. Toss with salt, pepper, 20 sprigs of thyme, and olive oil. Spread around the bottom of the roasting pan and place the chicken on top.
6. Roast the chicken for 1 1/2 hours, or until the juices run clear when you cut between a leg and thigh. 7.Remove the chicken and vegetables to a platter and cover with aluminum foil for about 20 minutes. Slice the chicken onto a platter and serve it with the vegetables.

Note: I highly recommend using a roasting pan that allows all sides of the chicken to be exposed, otherwise your skin doesn't get so crisp and golden. 

Wednesday, September 8, 2010

Jerk Chicken


Aubrey recently spent a week in Yellowstone backcounty equiped with a can of bear spray, some underwear, and a backpack full of dehydrated food ( there might of been some other items essential for survival, too.) He organized his meals by day in ziploc gallon bags. Cute, but certainly not appetizing. At least not my style of appetizing but, then again, I've never spent a week hiking 10 miles a day with 50 pounds on my back and no shower. I'm sure then anything would be tasty. 
Nevertheless, after a few days of making his own meals in a plastic pouch, he was missing me. I don't think we made it to the front door before he started a running list of all the meals I needed to make him asap. Before kissing me hello, he requested this jerk chicken... and, I get it. I would totally understand if this was his LAST meal request. This is some good chicken. And, it's really fun to place a plate piled with browned and juicy chicken  in front of a man who's just spent a week with three non-showered guys in a leaky tent. It's good to be appreciated.

Jerk Chicken
Gourmet, May 2002

There's no standard recipe for jerk chicken. Some are screamin' hot while others really allow you to feel the complex warming spices. Jerk chicken typically shows up in mid summer cookouts but I think it's great for early fall when I am craving some cinnamon and nutmeg. I used serrano peppers in this version but you can turn up the heat with habaneros or scotch bonnets.

For the marinade:

3 scallions, chopped
4 large garlic cloves, chopped
1 small onion, chopped
4 to 5 fresh chiles ( Serrano, Scotch Bonnet, Habenero...your choice), stemmed and seeded
1/4 cup fresh lime juice
2 tablespoons soy sauce
3 tablespoons olive oil
1 1/2 tablespoons salt
1 tablespoon packed brown sugar
1 tablespoon fresh thyme leaves
2 teaspoons ground allspice
2 teaspoons black pepper
3/4 teaspoon freshly grated nutmeg
1/2 teaspoon cinnamon


For the Chicken
Roughly 3 lbs of chicken, portioned- I used 10 drumsticks but you could use any combination of dark or white meat.

1.Add ingredients to a food processor or blender and mix until smooth.

2.Place marinade in a large Ziploc bag ( or, two bags if needed) and add chicken, shaking to coat. Sealm pressing out any excess air and place bag in a shallow dish ( to avoid any drippage.) Marinate for at least 2 hours and up to a day in the fridge.)

3.Remove chicken from fridge one hour prior to grilling.

For Gas Grill
Preheat burners on high, then adjust heat to moderate. Cook chicken until well browned on all sides, 10 to 15 minutes. Adjust heat to low and cook chicken, covered with lid, until cooked through, about 25 minutes more.

For Charcoal Grill ( from Epicurious)

Open vents on bottom of grill and on lid. Light a large chimney of charcoal briquettes (about 100) and pour them evenly over 1 side of bottom rack (you will have a double or triple layer of charcoal).

When charcoal turns grayish white and you can hold your hand 5 inches above rack for 3 to 4 seconds, sear chicken in batches on lightly oiled rack over coals until well browned on all sides, about 3 minutes per batch. Move chicken as seared to side of grill with no coals underneath, then cook, covered with lid, until cooked through, 25 to 30 minutes more.

Monday, July 5, 2010

Chicken Enchiladas with Tomatillo Sauce


Miami, OK has two main sreets, one McDonalds, one Wal-Mart, and four Mexican restaurants. I freaked myself out the first time I said, "Anywhere sounds good....except mexican." Needless to say, standard Mexican fare has worn on me. And, by that, I mean standard American Mexican  food which has been reduced to picking a number off of a combo menu. I needed to experiment with more interesting flavors. Enter Chicken Enchiladas with Tomatillo Sauce. Number one- these aren't swimming in some sauce only distinguishable by its color. Number two- I think these might actually be healthy. I adapted this from the orginal because I really didn't want to ruin all the healthiness by deep frying the tortillas. The result was fresh, light, and very different from my standard #23. Bonus: These are super easy to make.


Chicken Enchiladas in Tomatillo Sauce
Adapted from Simply Mexican by Lourdes Castro
Serves 3-4

1 lb (about 3) boneless, skinless chicken breasts
2 cloves of garlic, slightly crushed
1 onion, halved
2 bay leaves
1 tsp dried oregano ( I only had ground and it seemed to work fine)
1/2 tsp. salt ( plus more to taste)
2 cups Fresh Tomatillo Salsa
3-5 Tbsp. olive oil
1 onion, sliced thin
Black pepper
9-12 fresh corn tortillas ( this really depends on how full you stuff 'em)
Cilantro sprigs for garnish
1/3 cup crumbled cotija or feta cheese
1 cup mexican crema (OR, you could do like I did and thin out some sour cream with milk)
Optional: shredded iceberg lettuce for garnish

First, poach the chicken. Add chicken, garlic, one onion ( 2 halves), bay leaves, oregano and 1/2 tsp salt to a large saucepan. Add enough water to cover the chicken and bring to a boil. Decrease heat and simmer ( low boil) for 35 minutes until chicken is done. To check, just slit the chicken and make sure it's no longer pink and the juices run clear.  Allow the chicken to cool in it's broth and when it's cool enough to handle, shred the chicken by hand or with two forks, pulling apart all those delicious fibers.

Note: You can prepare the chicken the day before. Just keep refridgerated.

Next, saute the second onion that you sliced in 1 tbps of oil. Toss in the shredded chicken when the onion is soft and translucent. Transfer to a bowl and set aside.

Meanwhile, heat the 2 cups of tomatillo sauce over medium heat. Also, prepare your tortillas by lightly pan frying ( 1 tbsp oil per two to three tortillas) the tortillas in a flat skillet until golden but still pliable.

Assembly:

To build the enchiladas, you need your serving platter or individual plates on hand. To assemble, fill a tortilla with the chicken and onion filling ( about 1/4 cup each) and roll, placing the seam side down on your plate. Once you have placed as many as you like on your platter or plate, top with heated tomatillo sauce and finish with crumbled cheese, mexican crema ( or thin sour cream), and sprigs of cilantro. Serve shredded lettuce alongside if you choose.

Thursday, June 24, 2010

Pasta with Shrimp and Cilantro-Lime Pesto


I'm on a pasta kick. Good for my tastebuds, bad for my physique. Also, bad for the butcher because I haven't seen a need to eat meat for dinner all week. We're talking about ME here... this must be some kind of record. Anyway, the pasta...

First, I'd like to give myself props for actually using my foodie magazine this month and also for not abandoning it when I realized I had no jalepenos last night. I grabbed the car keys and dashed to Reasors. I felt so freakin cool. And, it was worth it. Having never had any pesto other than basil pesto, I was hesitant but quite relieved to find this meal refreshing and completely repeatable. Plus, it introduced me to COTIJA cheese, a mexican hard cheese that crumbles beautifully much like Feta, though more mild in flavor. I'm already looking for another recipe in which to use it.

Pasta With Shrimp And Clilantro-Lime Pesto
Bon Apetit, July 2010 (Adapted from Tejas Texas Grill and Saloon)

Serves 4

1 1/4 cups (packed) fresh cliantro leaves plus 1/4 chopped
1/4 cup (scant) chopped green onions ---I did the full 1/4 because, why bother?
3 Tbsp fresh lime juice
2 garlic cloves, pressed
1 Tbsp chopped, seeded jalepeno ( do take care to seed it with a utensil, not your finger... especially if you wear contacts.)
1/2 cup plus 1 Tbsp olive oil
1 lb linguine
1 lb uncooked medium shrimp, peeled and deveined
3 Tbsps tequila ( Ole!)
1/4 cup crumbled Cotija cheese ( or good feta will work fine. Bad feta, will not.)

Blend 1 1/4 cups cilantro and next 4 ingredients in a food processor until a coarse puree forms. With machine running, gradually add 1/2 cup olive oil. Season generously with salt. It will taste too salty but this will be fine as it will flavor the rest of the dish well.

Do ahead- this can be done the day before. Just cover and chill.

Cook linguine in large pot of boiling watter until al dente. Drain.

Meanwhile, heat remaining Tbsp of olive oil in a heavy, large skillet over medium-high heat. Add shrimp and cook until almost opaque (about  minutes.) Remove from heat and add tequila. Return to heat and cook an additional 30 sec- 1 minute until liquids are syrupy.

Add pesto, stir to coat and remove from heat. Toss with drained pasta to coat and season with salt and pepper to taste ( I didn't add any seasonings other than the pesto!) Serve sprinkled with crumbled Cotija and chopped cilantro ( if you remembered it.)


Wednesday, June 23, 2010

Swiss Chard Spaghetti with Garlic Chips


We are now officially moved! I'm happy to say the only thing we've yet to unpack are several boxes of books due to a severe lack of bookcase space. I'm thinking it might be time to part with some of my college-era books...seriously doubting I'll be reading Makers of Modern Strategy: From Machiavelli to the Nuclear Age again anytime soon. Also, twenty back issues of Everyday with Rachel Ray may need to go. Tough decisions. Either way, who needs reading material when you live in a city with a bounty of fresh entertainment options?

My entertainment has consisted of grocery shopping seven times in past two weeks. SEVEN TIMES. One trip was a trip to an Indian grocer where I procured garlic ginger paste and tamarind concentrate which will hopefully come in handy while recreating Bhavna cooks.

But, the trip that's nearest to my heart at the moment was my visit to the farmers market where I scored some swiss chard. Some people have a strong aversion to swiss chard despite being greens eaters in general. I have no idea if I like greens or not (seeing as this is the only type I've ever had) but it's dang tasty and the fact that it hums a soothing melody of health as it melts in my mouth makes it my current heart of hearts.

I've adapted the following recipe as found on Smitten Kitchen. The difference is that I substitute feta cheese for freshly grated parmesan and I remove the olives....olives me no likey. The resulting version is bold and earthy and it doesn't get ruined by nasty olives. Bleh.


Swiss Chard with Spaghetti and Garlic Chips
Adapted from Gourmet: November 2008 as represented by Smitten Kitchen

Makes 4-6 servings (we halved this)

1/3 cup extra-virgin olive oil
1 head garlic, cloves peeled and thinly sliced (lengthwise or crosswise)
1 medium onion, finely chopped
2 pounds Swiss chard, stems and center ribs finely chopped and leaves coarsely chopped separately (Green Swiss chard is recommended though I used red and green this time with no problems... plus, it looks pretty.)
1/2 cup water
1 pound thin spaghetti ( plus water for cooking)
6 ounces freshly grated parmesan (1 1/2 cups)

Heat oil in a 12-inch heavy skillet over medium heat until it shimmers, then cook garlic, stirring, until golden, about 3 minutes. Transfer garlic with a slotted spoon to paper towels to drain. (Be really careful not to let it burn. It's a total jerk when it burns. Believe me.)

Cook onion in oil remaining in skillet over medium heat, stirring occasionally, until softened, 3 to 5 minutes.

Stir chard stems into onion mixture with water and 3/4 teaspoon each of salt and pepper. Cook, covered, over medium-high heat until almost tender, about 5 minutes. Stir in chard leaves and cook, covered, until stems and leaves are tender, about 5 minutes.

Meanwhile, cook spaghetti in a pasta pot of boiling salted water (2 tablespoons salt for 5 quarts water) until al dente. Reserve 1 cup pasta-cooking water and drain spaghetti.

Toss hot spaghetti with chard leaves and 1/2 cup cooking water, adding more cooking water if necessary. Season with salt and pepper. Stir in parmesan cheese. Sprinkle with garlic chips and more cheese if desired.

Saturday, April 3, 2010

Ginger Steak Salad


Don't let the word "salad" fool you... this Ginger Steak Salad is a main course, completely filling and packed with flavor. I want to relive it for a moment here...the marinated steak served hot over crisp spring greans with blanched snow peas and topped with a sweet and spicy asian- inspired dressing... Aubrey stopped speaking entirely. Not that he was chattering away or anything but when he did speak, it was to the point: "This could be the best thing I've ever had." Look out Thai Salmon.

This recipe was influenced by The Pioneer Woman's Ginger Steak Salad and is pretty much the same except I added Sriracha in place of jalepeno in the dressing and added sweet snow peas and crisp red onion for color and crunch. I think they gave a nice fresh balance to the rich steak.

Ginger Steak Salad (Serves 2-3 BIG salads)

For Steak Marinade:


2 Tbsp. Soy Sauce
1 Tbsp. Sherry
2 cloves Garlic, Minced
2 tsp. Brown Sugar
1 whole Rib-eye, Strip, Or Sirloin Steak ( I used sirloin and will probably try Rib-eye next time as it was a little tough.)
2 Tbsp. Extra Virgin Olive Oil

For Dressing:


2 Tbsp. Olive Oil
2 Tbsp. Soy Sauce
2 Tbsp. White Sugar
1 Tbsp. Lime Juice
2 cloves Garlic, Finely Diced
1 Tbsp. Fresh Ginger, Minced
1 Tbsp. SRIRACHA!


For Salad:

1/2 Red onion thin sliced lengthwise
5-8 oz ( 1 small package) of Organic Spring Greens

4 oz. fresh snow peas, blanched ( boil 2-3 minutes- let cool.)


1. Combine steak marinade ingredients in a Ziploc bag or shallow dish. Mix and insert steak. Marinate 30 min. - 2 hours.


2. Whisk together salad dressing ingredients. Set aside.


3.When steak is finished marinating, add 2 tablespoons olive oil to a hot skillet or grill pan. Cook steak about 1 1/2 minutes per side, or until medium rare. Remove from skillet and place on cutting board and allow to rest for 5- 8 minutes. Slice thin against the grain, working at an angle. TIP: prep board with a bit of olive oil and sprinkle with kosher salt to avoid losing any delicious flavor. Yeah, I learned that from The Naked Chef.


4. Mound salad greens on a platter or individual plates. Toss with peas and most of red onion. Top with sliced steak. Drizzle salad dressing over the top. Sprinkle with more red onion on top and you're all set.


I highly recommend serving with firecracker shrimp. Be sure to reserve some dressing for dipping.

Monday, March 29, 2010

The Worst Mexican Ever Series: White Chicken Chili


It's time to be real... It's time for you to see what I make when the camera isn't snapping away...

It's time for you to see that my cats get on my countertops.


This is White Chicken Chili- pure canned goodness. I'm sorry I've been hiding it from you.


I like to make myself believe I'm too cool for canned goods but, I'm not. I don't make my own stock and I've never refried a bean. Someday I'll get there...maybe. Taco Bell makes some mean canned refried beans...

I've been eyeballing this white chicken chili recipe at Simply Recipes for some time but can't bring myself away from my new standby. Authentic? Probably not. Amazing? Totally. Friends from work serve this at parties and potlucks and I finally got the recipe. I almost always have ingredients on hand and it makes up in ten minutes.


Since I'm going full disclosure here, you'd better look at this:


You try to resist giving them a little canned chicken juice. Now you know.


One more thing... I have trouble following recipes exactly. You see that can of diced tomatoes up there? That was supposed to be a can of Rotel. I didn't catch this until I already added it so I diced up some leftover pickled jalepenos I had from making this and added crushed red pepper. It came out awesome prompting Aubrey to proclaim my "homemade version" to be the best ever.
Truth is good.


White Chicken Chili


1 can of Great Northern Beans
1 can of Rotel ( hot, mild, whatever. Or, diced tomatoes and add your own peppers.)
1 can cooked chicken breast
1 can corn
1 package white chicken chili mix
Optional Garnish-
Sliced Scallions
Sour Cream
Grated Cheese ( I use jack or colby jack)
Special Equipment: Can opener
1. Add all ingredients to a big pot. Bring to a low boil and simmer 10 minutes.
Serve on tortilla chips and garnish as desired.

Monday, August 3, 2009

Julia Child's Ratatouille


I'm not a huge TV watcher. When I do watch, I'm usually drawn to the food network and those weird food shows on the public station. Despite this, I only recall catching a Julia Child show twice in my whole life. Strangely, I could recognize her voice anywhere. Julia Child is a culinary fixture, the literal voice of a movement, the Chuck Norris of the kitchen. To many, her recipes are timeless classics. To others, her dishes are antiquated and reminiscent of a time long before I was wielding a spatula, that's for sure. The Julia of my mind leans toward the latter...a person you know through the collective filters of popular culture, certainly not accessible. Definitely not an inspiration to me.

When I read Julie & Julia, (a book inspired by the true story of a pioneering food blogger who randomly decides to make all 524 recipes from Mastering the Art of French Cooking in 365 days) I expected to be alienated, punished for not knowing a thing about Julia Child- a no-no in the food world. Instead I found something I could relate to... a real life Julia seen through the eyes of someone like me- a complete and utter non-pro. Did you know Julia Child started cooking when she was 32? If that's not an inspiration to try new things, I don't know what is.

In celebration of the triump of two 30ish women with the cajones to try something new, I decided to get all Julie/Julia and make a recipe from MTAOFC myself. I chose Ratatouille because it looked the EASIEST! Guess what? Not Easy! Am I a convert to Julia's ways? Absolutley not. Do I respect them? Completely. Just be prepared to do a lot of dishes because one dish wonders are not Julia's forte. And remember, do as Julia says!

Ratatouille- From Mastering the Art of French Cooking ( sourced from Bon Apetit August 2009)


6 Servings

Ingredients
1/2 pound eggplant
1/2 pound zucchini, trimmed
1 teaspoon salt
7 tablespoons olive oil, divided
1 8-ounce onion, thinly sliced (about 2 cups)
2 green bell peppers, thinly sliced into strips
2 garlic cloves, pressed
1 pound firm but ripe tomatoes, peeled, seeded, cut into 3/8- to 1/4-inch-thick strips
3 tablespoons minced fresh parsley


1. Promptly freak out about eggplant looking like a Conehead. Impersonate Coneheads for 3 minutes while watching the eggplant impersonate James Dean in the fridge.

Peel eggplant; cut lengthwise into 1/4-inch-thick slices, then cut into 3-inch-long, 1-inch-wide strips. Cut zucchini into same size strips. Place vegetables in large bowl; sprinkle with 1 teaspoon salt. Let stand 30 minutes. Drain; dry with paper towels.


Heat 4 tablespoons oil in large skillet over medium-high heat. Working in batches, add eggplant and zucchini to skillet; sauté until light golden, about 1 minute per side. Transfer to plate; reserve.

Add 3 tablespoons oil to skillet; heat over medium heat. Add onion and peppers; sauté until just tender, 10 to 12 minutes. Stir in garlic. Season with salt and pepper.


Place tomato strips atop onion-pepper mixture in skillet. Sprinkle with salt and pepper. Cover skillet; cook over low heat until tomatoes begin to juice, about 5 minutes. Uncover; baste vegetables in skillet with juices. Boil until juices are almost evaporated, 2 to 3 minutes.


Transfer 1/3 of onion-pepper-tomato mixture to 2 1/2-quart pot; sprinkle with 1 tablespoon parsley. Top with half of eggplant and half of zucchini, then remaining onion-pepper-tomato mixture; sprinkle with 1 tablespoon parsley. Layer remaining eggplant and zucchini over; sprinkle with 1 tablespoon parsley. Cover; simmer over low heat 10 minutes.


Uncover; tilt pot and baste with accumulated juices. Increase heat to medium; simmer uncovered, basting several times with pan juices until only 2 to 3 tablespoons juices remain in pot, watching closely to avoid scorching, 10 to 15 minutes longer. Season with salt and pepper.

You get all that? Makes Rachel Ray seem downright concise.


When you get all the dishes done, be sure to see Julia go to the masses when Julie & Julia, the movie, opens on August 7th.

Sunday, July 26, 2009

Meat and Potato Pie


Wow, has it really been over two weeks since my last post? It's not due to laziness in blogging...I promise! It's more like zero time to invest in securing ingredients unknown to the Wal-Marts in my town and only a fraction of my normal energy for such causes. Work has been demanding my whole existence for the last few weeks. At such times, I look to tried comforts, readily available and up for the task of satisfying the ravenous hunger of 10 working men or at least me and Aubrey for a couple days. That's right- Meat and Potatoes. This recipe is my mother's and it happens to be easy as pie... HA! I crack myself up. I like to have a vat of Louisiana Hot Sauce to go along with this and let me just say, I love any opportunity to use the stuff. Did you know my mom is the charter member of M.A.T.O.C ( Mothers Against The Overuse of Condiments)?? It's a one woman club but she's as active as a full force. Oh, mother... whatever will I do with you? I know, I'll make your flippin' amazing pie!

Meat and Potato Pie
(Serves 6 sorta hungry people and 4 really hungry people.)

Ingredients

1 pound lean ground beef
1 medium onion finely diced
1 Tbsp. minced garlic
Lawry's season salt ( the comforts are back!- this was the only seasoning I used through college.)
4 cups peeled and diced russet potatoes
1 can cream of mushroom soup
1/4 to 1/2 cup milk ( for thinning and rubbing onto top crust)
1 pkg. prepared pie crust ( top and bottom- I like Pilsbury in the red box.)


1. Brown beef with onions, garlic, and season salt to taste in a large pot. Drain of excess fat.

2. Preheat oven to 350 degrees.

3. Add potatoes, soup to the beef. Stir in milk as needed to thin out if you added more potatoes. Mix and season again to taste. Heat over medium high until bubbly. Reduce heat to low and cover for 30-40 minutes until potatoes are nearly soft. Stir occasionally and briefly.

4. While potatoes are getting all soft, prepare a 9" pie dish and get the crust out of the fridge so it will be near room temperature. Place the bottom crust in the pan.

5. When the meat and potatoes are done, add to pie dish and top with top crust. Feel free to get all fancy with crimping the edges to seal. I use the ol' fork method of pressing the tines into the dough around the edge to create a seal. Guess what? I totally just learned that the fork prong things are called tines. Yay for Google.

6. Cut slits into the top crust and rub a bit of milk on top to make a delicious golden crust.

7. Bake for 40-45 minutes, or until golden and not burned ( important.) You may want to put a baking dish underneath in case you overfilled. Not that I've ever done this, of course.

Yay! Let's eat this muther!

Tuesday, June 30, 2009

Chicken Potato Burritos


When I was younger, "What's for dinner?" became synonymous with "What type of burrito are we having tonight?" My mom is master inventor when it comes to burritos and when I was 14, she out did even herself. The year? 1999- The summer of the burrito. Along with the standard rice or beans, we had peanut butter and jelly burritos, hot dog burritos, even thanksgiving dinner burritos. Recipes? Hah! My friends came to dinner just to see what my mom could fit inside a tortilla.

I've since abandoned the hot dog burrito and occasionally make the corned beef hash burrito but just one invention has found it's way into regular rotation at our home....it is the chicken and potato burrito.

It took me forever to work up the courage to make this burrito. It's just one of those untouchable meals from your childhood that you can't make better than your mom, you know? I've added a few ingredients since it's humble beginnings but I gotta say... it still tastes better out of mom's kitchen. In the spirit of her free filling nature, I've provided you a rough guide to burrito heaven.

Chicken Potato Burritos
(Makes 8 hefty burritos)
Ingredients ( add more or less of anything depending on how you like it)
1 large boneless skinless chicken breast, cubed
4 largish potatoes, diced
1 medium onion, diced
1 green bell pepper, diced
Dark Chili Powder
Cumin
Lawry's Season Salt
Minced Garlic
1. Brown chicken in a skillet over medium high heat. Add in garlic and seasonings to taste.
2. Add onions and bell pepper and potato. Season a bit more to taste.

3. Cover and reduce heat to low. Leave covered for 15 minutes. When you open it, potatoes will be soft and starting to brown. Let's observe a moment of sizzle.

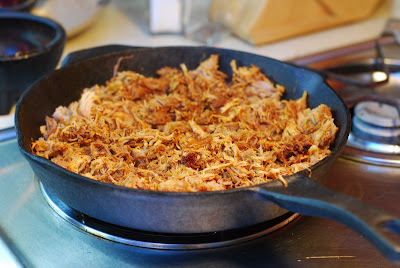
4. Raise heat to medium-high and brown until you have all those delicious brown bits. Serve in warm tortillas with cheese, salsa, and... and...and... I like mayo on it, okay? Feel free to go with sour cream like Aubrey but I'm pretty sure the entire country of Belgium would support me.

I'd love to hear about meal inventions from your past... Seriously, I can't be the only one with a mom who made bologna and cheese burritos can I? Anyone? Anyone?

Tuesday, June 16, 2009

Summer Vegetable Farfalle


I can't claim to go way back with this hippie of a meal. We're relatively new friends. To me, a meal wasn't a meal unless it included a nice helping of meat or, as some midwesterners like to call it, food. Fortunately, I decided to try this dish with absolutely NO MEAT last summer. Much to my surprise, I dug it. Really. Plus, there's something completely peaceful about preparing a meal of fresh veggies and herbs from your own garden. Mine are growing like freaks right now...


So, in addition to being super tasty, this dish helps make good use of the basil attempting to consume my pots and my fantasies. What could go wrong with basil on basil? It's not like I'm baking it. And, yes, I realize there's no basil in the pic... it was being shy today.

Summer Vegetable Farfalle
Adapted from The Pioneer Woman's "Farfalle with Zucchini Recipe"
Liberally serves 2 plus leftovers!
Ingredients

2 small to medium sized zucchini, diced
1 small pkg. grape tomatoes, halved
1 medium white onion, diced
3 cups Farfalle pasta
1/2 cup white cooking wine ( I used Chardonnay I had open)
1/3 cup half and half
A generous amount of chopped herbs including basil ( I used about 12 large sweet basil leaves, a large sprig of oregano, and about 15 leaves of another basil variety that I don't know the name of...)
3 Tbsp. Extra Virgin Olive Oil
3 cloves of garlic, minced
1 cup freshly grated parmesean cheese
Kosher salt and Fresh Ground Pepper

1. Get your pot of water on and cook the Farfalle according to directions until al dente.
2. Add 2 tbsp. of extra virgin olive oil to a pan ( one that you can scrape to deglaze) and heat medium- high. Add zucchini and brown. Season with salt and pepper.
3. Remove zucchini to a plate. Set aside. Add remaining oil and onions, scraping the browned bits from the zucchini. Saute over medium to medium-high until softened and nearly carmelized.
4. Lower heat to medium low and add halved grape tomatoes.
5. Add wine. Simmer until reduced by 1/3.
6. Add half and half. Bring to a simmer and reduced until thickened. If it gets too thick, add some of the starchy water from the pasta!
7. Season to taste with salt and pepper. It needs a bit of the stuff so don't be afraid.
8. Add drained pasta and herbs and cheese. Mix.
9. Serve immediately garnished with more herbs and more cheese, of course.


There you have it. All the chop chop, none of the butcher block. Enjoy.

Tuesday, May 12, 2009

Spicy Orange Garlic Shrimpys

Mmmm, spicy orange garlicy goodness….


Want to know how cool this meal is? So much so that I made it for Christmas Eve 2008, that’s how cool. I mean, it’s no Braums ( Flashback Christmas Eve 2007- sorry, husby…I’ll never do it again) but it’ll do. Also, so cool that it warranted getting a new plate just to enhance its awesomeness (stay with me, you'll see it in the photo...a bit.)

Seriously now, shrimp is one of those things that used to frighten me. I mean, it was up there in my list of scary things to cook like a whole chicken, ribs, a souffle, flan, or just about anything baked, in general. Anyway, shrimp has officially made a departure from that list. Not ready to open the world of seafood up in this kitchen beyond shrimp and salmon, but I’m making progress.

Something that makes a recipe decidedly NOT scary is pure simplicity. Give me a few ingredients and a skillet and I’m good to go.

Spicy Orange Garlic Shrimp (Adapted recipe from The Pioneer Woman contributor, Pastor Ryan…you rule, man.)


Ingredients

1 lb frozen, raw “shell on, tail on, deveined” shrimp 26-30 per pound size ( “” means…yeah, right. I bought them ready to go.)
¾ cup Orange juice
2-4 gloves of minced garlic ( psst, don’t tell…this became 2 tbsp. of jarred minced stuff.)
3 Tbsp. SALTED butter
½ tsp Ground Cayenne Pepper
1 tsp. Old Bay Seasoning ( I had to buy a can just for this. I told you I don’t do seafood…)

1. Prep, thaw and dry your shrimp. If you’re cool like me, this shouldn’t take long. If you go the shell on stuff, guess what? You have to take it off. Sorry ‘bout that.
2. Thinly slice the garlic if you used whole cloves and add to orange juice. I actually think you should do what he says here... the minced stuff makes for awkward deglazing. 3. Add seasonings to garlic/juice. Stir and let it hang out for a bit.
4. Meanwhile, heat up 2 tbsp. of the butter on high heat in a frying pan until it’s melted but just before it starts burning.
5. Quickly add shrimp one at a time so they all have a full side down. Wait 30-60 seconds from the time you put the last one in to flip the first one you put in. Tongs are ideal for this. Pastor Ryan says so, too.
6. Once the last shrimpy is flipped, wait another 30-60 seconds and they should be cooked through with a nice caramelized exterior. Remove shrimp to a plate or bowl and LEAVE THOSE BROWNED BITS. Leave the heat on until it starts to smoke a bit. This is important. I don’t know why, but it is. Look at all that poorly lit naked shrimp...


For some reason, a doctors office comes to mind when I look at this... yeah, anyway...

7. Add garlic juice mix to the pan and deglaze. Scrape up all that browned goodness and let it boil. 8. Add the final Tbsp. of butter and simmer the sauce down until thickened. You can leave it more saucy if you like (which I do because I like to pour it over rice.)
9. Turn off heat, toss in the shrimp and coat. Serve all on their own or over rice. It’s yum. So, stop looking at pictures of shrimp and go eat some.

Monday, May 11, 2009

Whip Me Up Some Pizza!

I've been super excited about getting into the swing of things in the kitchen now that my schedule has settled down a bit. I even went grocery shopping at a real live grocery store this Sunday on our way back from Porter, OK. The only problem is that my excitement as of late has got me as far as theory and shopping lists but no further. When it comes time to crack open a little sumthin' sumthin', I go blank. No inspiration. Only hunger. This happened to me tonight. I had grand plans of making a spicy orange shrimp dish ( which will hopefully make an appearance tomorrow) but instead I almost made a Taco Bell run.


As luck would have it, I did get some semblance of inspiration and made pizza (inspiration came in the form of an extremely low bank account...no eating out for us for a while.)
Fortunately, pizza is the easiest thing in the world to make, especially if you have a premade crust. I had been buying a premade thin crust but I find them cumbersome to store and not so tasty, anyway. Then, I discovered the wonders of Naan. It's a traditional Indian bread and goes great with currys and masala. It also makes an excellent pizza crust. It could probably also make a good one way boomerang.

I have no recipe to share other than what I threw on the Naan tonight. It turned out pretty amazing. So, when following a recipe starts to feel like a chore, whip out your intuition and go crazy ( as long as it doesn't get you into making a Turkey Burger.) Aubrey says he doesn't quite trust me yet but he doesn't NOT trust me anymore after the burger fiasco. Redemption!


Today's Naan Pizza - Serves Me

1. Preheat oven to 350. Place naan with a little bit of olive oil in the oven on a baking sheet to start heating up.

2. Meanwhile, saute sliced portabello, onion, and minced garlic until soft. Add swiss chard greens and cover with lid about 4 minutes on med/low heat until wilted. I didn't measure anything out...just determine how much topping you want.

3. Pull out bread and smear with a bit of basil pesto. Top with sliced fresh mozzerella, all that stuff you just sauted and sliced tomato. Sprinkle with Italian seasoning and fresh basil leaves.

4. Broil and remove when melty but not burned yet like mine. It was still good but a little charred. Like my mind.

Monday, April 20, 2009

Test Kitchen: Dijon Chicken

I decided to start a new test kitchen series where I will make recipes solely out of cookbooks I already own. You see, I have a vast library of cookbooks because I’m a sucker for food photography and anything food related. Plus, I’m pretty sure my mother-in-law buys them in bulk for my Christmas gifts. No complaints here….just a lack of utilization. No more book neglect from this foodie.
Well, I didn’t get off to a great start using said library…instead, I grabbed a magazine I had saved for some reason from 2002: The Better Homes and Gardens Special Publication for 100 Comfort Cooking Recipes. I probably saved it because that sticky roll was winking at me.


I haven’t exactly set the rules for this Test Kitchen business… I suppose I should have to follow a recipe exactly out of my stash but, rules are made to be broken. So, recipe 25 out of 100 was for Chicken with Pasta Primavera. It called for roast chicken and vegetables over thin spaghetti and all in this mustard sauce. The mustard sauce was appealing and I already had the ingredients on hand. Plus, I really like mustard. And, I really like Dijon. All those people staring into the mustard shop like it, too, but I'm not a dork like that. I drool from across the street.


Anyway, thus was born Dijon Chicken and I think it already has a devout following in my house (which is a testament to it’s yumness since I made it like a day ago.) Basically, I just smothered the chicken in the mustard sauce before roasting. That’s it. A no brainer!

Dijon Chicken ( Adapted from Chicken with Pasta Primavera- Better Homes and Gardens Special Publication, 2002)

Serves 2 ( assuming you eat 2 ½ chicken drumsticks a piece, I’ll probably make 6 next time…awkwardness, ya know?)

5 Chicken drumsticks with skin on
1 Tbsp. Dijon mustard ( Pardon me, will you pass the Grey Poupon?)
1 Tbsp. Extra Virgin Olive Oil
½ tsp dried oregano, crushed
¼ tsp. celery salt
¼ tsp. dried thyme, crushed
A pinch of kosher salt (or, whatever, I just prefer my salt more coarse for this)
Fresh Ground Pepper

Preheat oven to 350 degrees.
Mix mustard, oil, oregano, celery salt, and thyme together.
Smear it all over your chicken in a baking dish roomy enough for the legs not to be touching.
Sprinkle with salt and pepper.
Bake for 30 minutes.

I like to broil mine for about 2-3 more minutes to get browned, but that’s because browned bits rock my world.

For a quick side, I made some roasted red potatoes which are a cinch. Just quarter some red potatoes into bite size wedges, coat with a bit of extra virgin olive oil, season to taste and bake for 25 minutes at 350 degrees. I seasoned with rosemary, salt, pepper, and smoked paprika (for a color boost…a trick I learned from Kay in the Netherlands.)

In the last 7ish minutes of baking time, I sautéed some asparagus in extra virgin olive oil salt and pepper in a frying pan. Put everything together and you have yourself instant comfort food pretty enough to even be company food! See, I saved that magazine for a reason, after all.

Saturday, April 18, 2009

Frijoles Negros De Cubana

So, I have no idea if that actually says "Cuban Black Beans," but let's say for arguement's sake that it does. And let's also say that they're simple and delicious. And while we're at it, we can assume that they're authentic, too, right? Let's not go crazy, I guess.

How I arrived at this recipe was a bit of a rebellion...you see, we eat a lot of beans at this house and I'd grown up with a certain prejudice to black beans. My mom is a pinto loyalist to the core. Black beans were "Tex-Mex" and, as a rule, we don't do that stuff. Tijuana, yes. El Paso, no. So, I was feeling rather liberal and wanted to try these babies out. Granted, I didn't go Tex-Mex( which I'm happy to report, I've had and love) but I did stray far from the bean of my childhood.

Frijoles Negros ( Adapted from a five-star recipe on RecipeZaar found here!)

Serves 6

About 2 tbsp. extra virgin olive oil
2 (10 ounce) cans black beans with juice (don't hate the cans.)
1 medium onion, chopped
1 green pepper, chopped ( sometimes, if I'm getting lazy, I use 2, 4 oz. cans of green chiles.)
4 cloves garlic, minced ( you know you wanna use the jar stuff...)
1 teaspoon cumin powder
1/2 teaspoon oregano
1/2 teaspoon salt
1 tablespoon red wine vinegar ( oh my gosh, use more...it's amazing.)

1. Saute the pepper ( or chiles) and onion with the oil.
2. Add the garlic.
3. Add a bit of bean juice until everything gets soft.
4. Add the rest of the beans, all the spices, and simmer 30 minutes.
5. Add vinegar just before serving. Add a bunch. Then, add more. Yum.

We eat these over rice as a whole meal now...not the most gourmet thing I've ever done but sometimes it just hits the spot. I've made them as a side to roast chicken and I've actually made them on a camping trip, as well...they're so easy, especially if you pack the other ingredients already prepared. So, go try new things! Am I the only one with random food prejudices?

Monday, April 6, 2009

Chicken and Stuffing for Jen


Jennifer, my Colombian sister and bff from Cali, is a fairly high maintenance woman. She will settle for no less than the best. She’s a name brand junkie and she’ll probably laugh that I said “name brand” instead of “label.” She also gives me instant advice on anything I need to buy, from face moisturizer to under eye concealer…way cool. I like to remember that it was yours truly who first introduced the girl to makeup when we were in middle school, but hanging on to that fact has only become more and more lame over the years. Where she got the looks, I got the cooks. Sadly, my diva’s idea of cooking is very similar if not identical to re-heating.

She emailed me last Friday with a craving for her all-time favorite meal that my mom used to make us when we were little…chicken and stuffing. Delicious and incredibly simple, I’d forgotten that little miss high-class knows how to eat the good stuff. Chicken and stuffing is not company food. It’s not pretty. It’s practically all the same color. BUT, it’s “stick to your ribs” delicious and, if you swap out for low fat versions of all the ingredients, it won’t necessarily stick to your hips either!

So, it turns out, Jen is pretty easy to please. Of course, I’ve known that all along… 15 years of this and we’re still going strong.


For you, my love!

Chicken and Stuffing

2-4 chicken breasts ( basically, enough to fill a 9x 13 inch baking dish)
1 large can of cream of mushroom soup ( swap for 98% fat free for a good time.)
1 cup of sour cream ( or, light)
1 cup Stove top stuffing
1 cup hot water
Lawry’s season salt

1. Preheat oven to 350.
2. Place chicken in baking dish and season with Lawry’s season salt. Bake 15 minutes each side covered with foil.
3. Meanwhile, mix soup and sour cream together. Set aside.
4. Mix stuffing and cup of hot water together. Set aside.
5. Carefully remove chicken from oven and top with soup mixture. Smear it around so it blends with the chicken juices and everything is well covered in it.
6. Evenly sprinkle the stuffing on top of it all.
7. Cover with foil, bake 35 minutes. Remove foil and bake an additional 5-10 minutes, or until desired brownness of stuffing.

8. Devour with a side of mashed potatoes. Oh, and if you’re wondering if your eyes can still see color, garnish with parsley. Ta Da!

Tuesday, March 10, 2009

The Worst Mexican Ever Cooks!: Albondigas


I just got back home from Austin, TX on Sunday and was having some cooking withdrawals. Sure, I had some fine meals ( of which I'll blog later....) but I've been ansy to try out some new recipes out of all the foodie mags I read on the plane. I was planning out my grocery list at my Mom's house (with the intent at making a stop at a real live grocery store so I could avoid the Walmarts) when I suddenly remembered my all time favorite soup: Albondigas. Out went the plans to find roasted red peppers and a leg of lamb. Enter Mexican comfort food.
Okay, so I didn't actually suddenly remember it. I've actually been hounding my mom for her recipe for ages. On Sunday, she finally shared.
There's a bit of a story that goes with this recipe. We got it from our neighbor when we lived in Perris, CA. about 13 years ago. Our families were pretty friendly, swapping recipes, sharing bird baths, afternoon snacks, etc. Then, they got a dog. A little yipper, to be exact. My dad had to commute for several hours to work and this little muther barked all day and all night resulting in little sleep and lots of stress. After speaking with the neighbors about the issue, we learned that our angst fell on deaf ears ( well, they maintatined that since THEY didn't hear the dog, it wasn't a problem.) So, my dad installed an antique fire alarm on the side of our house near their bedroom window. He blasted it all night to see if they heard THAT! They say they didn't. Anyway, after a long drawn out battle, we eventually had to call animal control to ask them to do something about the dog. Animal control came and took the dog! We didn't even count on that! They moved the bird bath back to our side, shoved my baby brother off his bike when he touched their lawn resulting in my mom's longest stream of profanities to date, and planted a hedge to screen us out (which I'm happy to report has finally grown in some 15 years later.) Fortunately, before the fallout we scored this recipe:
Phew...
Albondigas ( Mexican Soup with Mexican Drama)
2 small cans of tomato sauce
1 to 2 lbs of lean ground beef ( make sure it's lean because it will get greasy otherwise.)
5 tsp. Tomato Chicken Boullion
10 cups of hot water
A rough handful of raw white rice
2 Tbsp. ground Mexican Oregano
2 Tbsp. minced garlic
6 bay leaves
2 cups diced carrots
2 cups diced potatoes.

In a large pot or dutch oven, put 10 cups of water on to boil.
Combine beef, rice, oregano, and garlic and form smallish meatballs.
When water is boiling, add tomato sauce, boullion, and bay leaves. Return to a boil and drop meatballs in one at a time.
When meatballs are cooked through, add carrots and potatoes. Boil until tender or about 20 minutes.
Serve with tortillas.
This recipe is so good your mom will cuss like a sailor, too.

Wednesday, February 4, 2009

The Worst Mexican Ever Cooks!: Carnitas

I've been called many things in my life but the funniest has to be when someone proclaimed, "You're the worst mexican ever!" upon learning that, YES, I'm mexican...and, NO, I can't speak spanish. Sure, two years of spanish in high school and four semesters in college should help, but it doesn't. I'm so lousy, I can't even learn it...

Okay, okay, I understand more than I let on and, for some reason, I can sing in Spanish. But, at the end of the day, the only thing to visibly validate my hispanic hertiage is my ability to make some kick-ass mexican food. Is it always authentic? No, but then again, I have to keep up appearances with the Polish, Irish, and Cherokee, as well (somehow, with all of that going on, most people think I'm from the Phillipines.) Added bonus: Aubrey totally can't tell the difference...between authentic mexican food or not! Now that I think about it, the Phillipino thing totally worked in my favor, too. What is it with white guys and asian girls?

So, here's to kicking off a new series of "The Worst Mexican Ever, Cooks!" where I'll share with you my favorite Mexican meals with a dash of identity crisis.

Up first, Carnitas:


Carnitas means "little meat" and the cool thing is, when you make up a batch, there's nothing little about it. It will last you for days. I have no clue where I learned how to make this but here ya go:


1 Pork butt roast...yum ( about 2-3 pounds)
1 yellow onion
2 Tbsp. minced garlic
Lawry's season salt
1 c. water

Double the following measurements for the whole roast. I use 1/2 the roast from this point on...no worries, I'll explain.

2 Tbsp. dark chili powder
1 tsp. cumin
Water to make paste
1. Okay, when you get up in the morning, slice up the onion and put it in a crock pot with the roast, garlic, and sprinkle generously with the season salt. YES, lawry's season salt. It's yum.
2. Add cup of water and cover. Cook on HIGH for 8 hours.
3. When you get home from work, put your keys where you can fnd them in the morning so you aren't late to work again. Preheat oven to 425 F. Then, in a large bowl, remove the roast from the crock pot. Leave most of the onion behind. This might be tough to do because the roast will be so moist and tender, it's just gonna fall apart. DON'T get rid of the juice yet!
4. With two forks, pull the pork apart until you have it all shredded. At this point, I save up half of it because I usually end up craving pulled pork bbq sandwiches and this is a great leftover.

5. Mix chili powder and cumin in a dish, adding water until it makes a paste a bit on the runny side. Set aside. ( Double these measurements if you're using the whole roast...)

6. In an oven safe skillet, add the shredded pork and mix with the spice paste. Heat over medium heat for about couple of minutes adding the reserved juice if it seems to dry.


*Note: You can add these seasonings into the crock-pot to cook all day, but, like I said, I like bbq sandwiches out of this pork, too. It doesn't really affect the flavor. Carnitas is all about the texture!

7. Pop the skillet into the oven you preheated at 425 F. This is crucial. It gives the carnitas characteristic moisture with crispy edges. Heat for about 5 minutes. If you do more, it will get dry.

8. Serve with corn tortillas, green chiles, and cilantro. Go crazy and add tomato, guacamole, and sour cream.